Easy Card Making Ideas

Bringing your card making ideas to life into handmade greeting cards is a lot of fun, therapeutic even...except for the times when you can't come up with any cardmaking ideas. Then it just becomes frustrating and not so much fun.

Although I love to make challenging, complicated, fancy handmade cards every now and then, it's actually when I make cards that are easy (but still fantastic looking) that I enjoy myself the most. It's a great feeling when you create handmade greeting cards that you can truly be proud of and to be able to create it with no frustration is incredibly satisfying.
To be honest, coming up with a DIY layout idea is challenging most of the time. Even after spending an hour scrolling through Pinterest, which by the way, is longer than it takes to make the card itself.
I'm going to share some of my easy greeting card making ideas with you. All of the ideas below use cardmaking sketches as inspiration from the book, 599 New and Inspiring Card Making Sketches. The book has a great mix of easy-peasy simple sketches to more detailed, and I have focused on the easy-peasy sketches to show you my ideas.
Easy Greeting Card Crafting Ideas!
Easy idea #1 - Use images you already have
Make use of images that you already have lying around your house rather than waste time creating or sourcing new ones. More often than not, this is an image on beautiful patterned paper or cardstock in your stacks, or it could also be an image from an old children's book the kids have ruined.

I even set aside a birthday card invitation the kids received last week that had a cute picture on it from the Troll's movie. This will eventually make a great themed embellishment on a birthday card!
In the example below, I have used a sketch from page 81 of the book. The image I already had was a cupcake from a party-themed paper stack that I've had for quite some time. I left a bit of white around the edges when I trimmed it out so that it stood out more, and adhered it to the card using double-sided foam squares to allow it to pop out a bit.
The bunting was also an image I already had on a mini-paper stack, which is also where the pink rectangle was taken from. The remaining elements, consisting of the three-circle shapes and little stars, were created easily with a craft paper punch.
You can also snip out letters from old magazines to spell out happy birthday but overall, this design was easy peasy and I love how it turned out!

Easy idea #2 - Use washi tape to make candles
Use your washi tape to make some candles as the main feature which is great for birthday cards. It's no secret that I love washi tape and it's not just great for creating candles. It can also be used for other design elements on your card such as an easy greeting card border, simple bunting, or even just a horizontal or vertical strip.
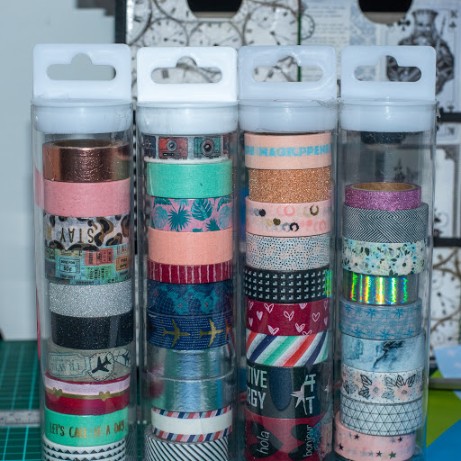
In the example below, I have also used a sketch from page 81 of the book. The candles were created with three different washi tapes and although you can't tell from the photo very well, the two on the left are very glittery!
The bunting is the same one used in idea #1 and was an image I already had on a sheet of paper from a mini paper stack. I have a tray that all my leftover scrap pieces get tossed into and the other elements were found rummaging around in this to find a color I was happy with and then cutting it into shape.
To finish the card off, a black fine-liner was used to draw a candlewick onto the yellow flame and a line of self-adhesive gems was added to one of the candles.

Easy idea #3 - Use stamps
Use your stamps to make an easy, quick, and effective background for greeting cards. A clear stamp will be easier to work with so that you can see exactly where to place it on your page around the words. Clear stamps are often sold in a theme pack, meaning that you will be able to get a few different shapes or images (depending on the theme you buy) that go well together to add some variety to the page.
Below are the stamps that I used for this particular card, a series of four butterflies in different sizes.
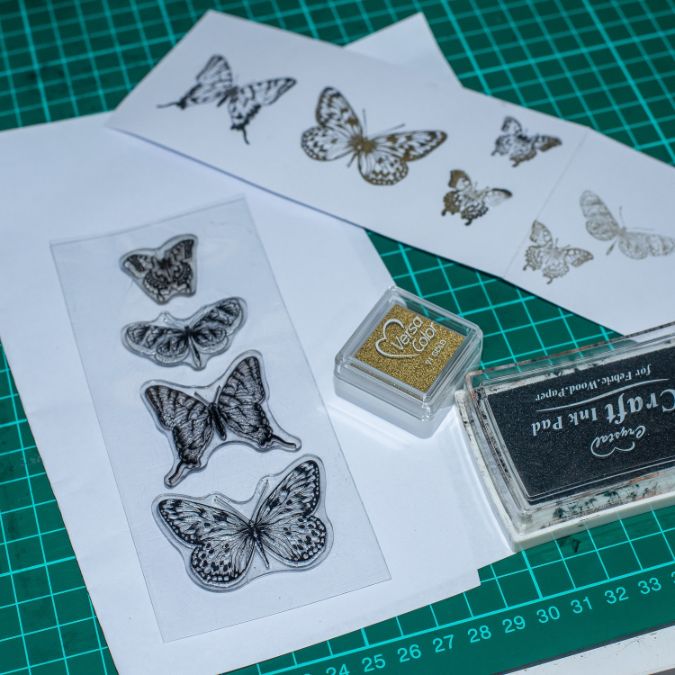
Don't be afraid to try specialty inks, such as distressed ink, or add another layer of color over your existing stamp.
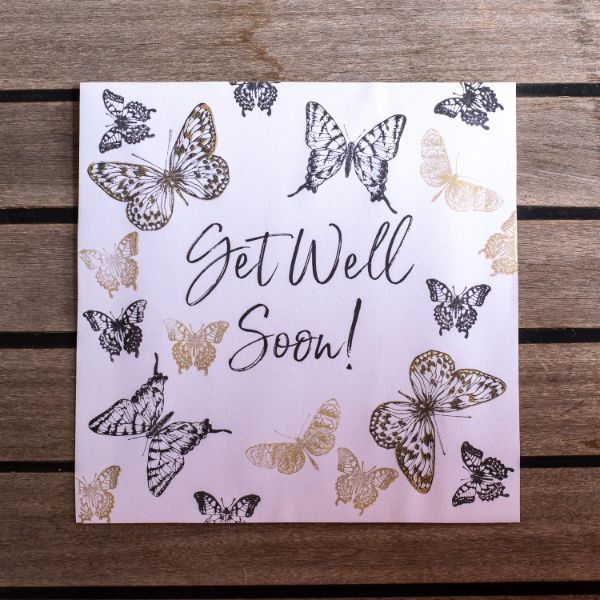
In the example below, I have used a sketch from page 84 of the book. I didn't think my handwriting would cut it for this card so I printed the sentiment, "Get Well Soon" directly onto paper, which I then glued flat onto my card base.
The butterflies were stamped on in random places around the words, make sure you stand back and look at it every time before stamping again. THis ensures that there are no large gaps. I used standard black ink and also a gold glittery type of ink. Some butterflies are black, some are gold, and some have been double-stamped using both.
This card is super simple and doesn't take long at all. I think the hardest part was choosing which stamps and colors to use!
Easy idea #4 - Use simple shapes
Make use of simple shapes that are easy and fast to cut out for a fantastic looking, uncluttered design. Let's face it, cutting out intricate shapes with a craft knife can be time-consuming and frustrating to do for every single card. Using simple shapes such as rectangles, triangles and squares make for some great designs and although I'm not quite sure why are often strangely satisfying to lookout. Feel free to make use of your craft paper punches in simple shapes!
In the example below, I have used a sketch from page 12 of the book and I may have gone a bit overboard with all the pink!
Starting with a black card base, I went through my card stock scraps and picked out a few different pinkish-toned pieces. I measured and snipped the rectangle layers first and stuck them down with a glue roller.
The really, really, the hot pink piece was jazzed up by using a craft paper punch for the edges and this was adhered using double-sided foam square pieces to add some depth to the card. The sentiment that reads "Stay Wild", is a strip of washi tape that I have been dying to make use of.
Finally, the wild unicorn was a wooden die cut that I already had and the hearts were created with a craft paper punch and stuck down with double-sided foam squares.

Easy idea #5 - Create your numbers using small adhesive embellishments
Rather than painstakingly create some giant numbers with a craft knife (I'm terrible at cutting curved bits), use up your small adhesive embellishments to create the numbers. Alternatively, lightly draw the number on your card, place some glue over your pencil line, and sprinkle some glitter on top.
In the example below, I have used a sketch from page 19 of the book for inspiration in creating this birthday card. Starting with a bright yellow pre-made card, I found a cute piece of patterned paper in one of my mini paper stacks and following the design sketch, trim and glued down a strip for the top and bottom of the card.
Next, I lightly drew on the number 16 with a 2H pencil and then squeezed out a strip of liquid glue over the number. Before the glue could dry, I stuck down these little flower embellishments that have been floating around in my sewing corner for quite some time.
The sentiment "Sweet" was created using letter stamps directly onto yellow cardstock, which was then mounted onto another black piece. The whole thing was stuck down with double-sided foam squares to give it a little more depth.
Finally, some twine was glued in a horizontal strip above and below the 16 and also at the bottom of the card with a little bow.

Want some more awesome handmade card ideas? Check out our article full of amazing handmade graduation card ideas!
Easy idea #6 - Go for a minimalist theme
I'm really enjoying the concept of minimalist cards at the moment. I love the uncluttered feel of simple designs with a lot of "space", and it also gives you the opportunity to really showcase the nice patterned and plain cardstock and paper you have, which can sometimes get lost in a cluttered card.
In the example below, I have used a sketch from page 41 of the book. Starting with a pre-made card base, I stuck down the beautifully patterned cardstock that I wanted to showcase.
The white strip was jazzed up with a papercraft punch designed for edges and the other elements were trimmed from scrap pieces. Finally, I cut out both a red and white heart shape with a craft paper punch, gluing the red one flat onto my circle embellishment. The white heart was folded in the middle and stuck down by running a thin strip of glue down the spine.
This design was super easy and I quite like how it turned out!

Easy idea #7 - Use pre-made embellishments
Pre-made embellishments (die cuts) can be purchased from the card making and scrapbooking sections of your local craft supplies shop, two-dollar stores, and the craft section of large department stores. These can be novelty stickers, cardstock pre-cut into various shapes, pre-made pretend flowers, or even little mini wooden shapes, letters, and numbers.
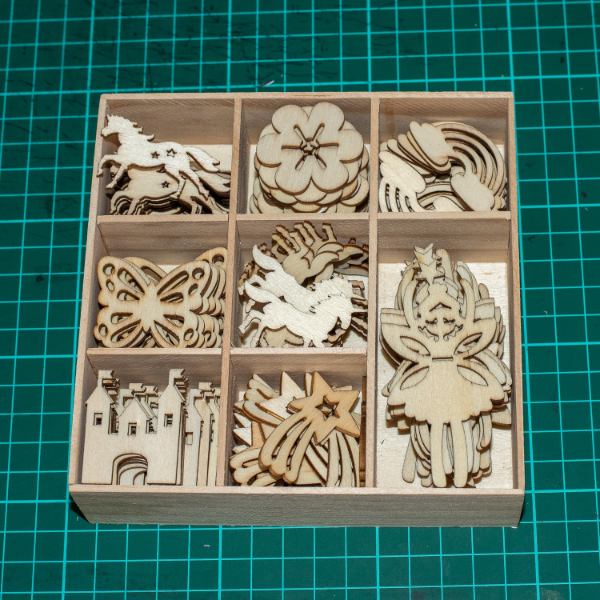
Below are some little wooden pre-made embellishments that I purchased from the craft section of a large department store.
In the example below, I have used a sketch from page 107 of the book.
This card was really easy to make and did not take long at all. Starting with a pre-made card base, I trimmed to size and then stuck down my purple patterned paper on top using a glue roller.
Next, I cut a white piece of cardstock slightly smaller than the actual card so that when it was adhered to the purple would show through around the edge as a border. Before I glued the white card down, I traced around a circle lid that I had lying around and trim it out using a craft knife. Now the pretty purple background can show through the circle I just cut out!
The sentiment "Thinking of you ... " was handwritten, which I don't love to do but I felt a DIY printable wouldn't suit the simplicity of this card. A word sticker would have been fantastic!
My pre-made embellishments were glued down onto the card and finally, a purple self-adhesive gem was stuck onto the back of each butterfly to finish off this easy and simple card.

Note: For more fun card making ideas, you can check out our "Halloween card ideas" article and discover plenty of fun DIY Halloween card making designs!
Easy idea #8 - Let the words do the talking
Don't be afraid to keep the embellishing really simple and let the words do the talking. If calligraphy (or even super neat writing) is not your thing, you can print the words directly onto cardstock before folding the card up, or even make use of stickers and stamps. Either way, keep the embellishments small and simple and let the words really shine.
In the example below, I have used a sketch from page 109 of the book, 599 New and Inspiring Card Making Sketches for inspiration. I often try to sneak in a design that's made nearly 100% from washi tape and I managed to do it again with this layout!
Starting with a pre-made card base, I printed out the words "Thank You" in a bold black font onto a sheet of white paper and stuck it to my card base using glue tape. The words were purposely placed slightly off-center so I would have room to add the washi tape in the bottom right-hand corner.
This card was super simple to make as the border, the bottom, and corner strips are all made from washi tapes. The hardest part is choosing which washi tape to use!
The words were jazzed up with the use of a glittery gold gel pen and a gold self-adhesive gem.

There is something very satisfying about creating cards that are both simple and effective and I really hope these card making for begginers tips that we shared have provided you with some inspiration to get started on your next greeting card.
We would love to see your version of some of these layouts, or any easy greeting card ideas you come up with.
Have you ever heard of pop up cards? Check out our article about pop up flower cards and learn how to make amazing pop up cards in record time!
Happy Card Making!
Seen Our Sister Site?
Check out ScrapbookingCoach.com by clicking here.
© Copyright 2025 - CardMakingCollective.com