Incredible Ideas Using Rubber Stamps for Card Making

In search of a simple but beautiful card design for your next project?
Try out these card making ideas!
Guest post by: Jessica Palmer
Most card makers have at least one or two rubber stamps for card making in their craft stash. It could be simple letter stamps or an intricate picture but either way, those rubber stamps make a fantastic decorative element to your cards.
To help you along with your rubber stamps, here are eight simple ideas on how to incorporate them into your card making.
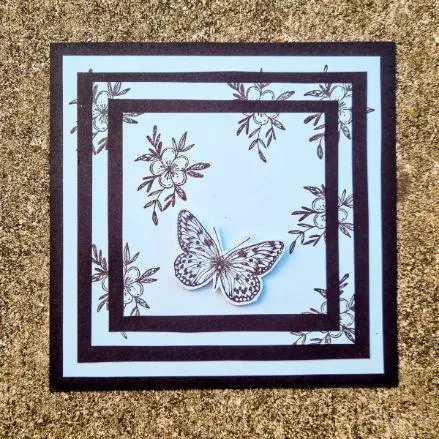
#1 - Keep it simple with layers of black and white
Keep it simple and effective with three black and white stamp layers. This rubber stamp idea for card making is pretty easy to replicate. Using three different-sized white squares, each one smaller than the next, place the white squares on top of each other with the largest on the bottom and the smallest on top. I used a 5.5- inch, 4.5-inch, and 3.5-inch square.
Grab your stamp, load it up with black stamping ink and begin stamping your three white squares as if it were just one large square, making sure to overlap some images so that they are on two or more different size cards.
Once the ink has dried, mount your three white squares onto black squares sized slightly larger and glue them down on top of each other as per the photograph below. I used black squares sized 6-inch, 5-inch, and 4-inch for mine, with the larger 6-inch piece being the card base itself.
To finish it off, I stamped a butterfly onto a scrap piece of white cardstock with black ink, cut it out, and mounted it with a foam square to make it pop out a little.
If you can't get your hands on some rubber stamps, clear acrylic stamps work as well!
#2 - Stamp over a strip of removable tape
This is one of my favorite techniques for using rubber stamps in cardmaking as it's just so easy and quick to do. Lay a strip of cheap washi tape down onto your card and using your rubber stamp and some ink, stamp out your image multiple times, making sure to overlap the image over the tape.
The reason I suggest using cheap washi tape is that the tape will be removed and discarded and washi tape doesn't usually ruin your paper or card when you peel it off the paper. If you were to use normal sticky tape, this would most likely rip your paper when you peel it off afterward.
Once your stamping is completed, remove the tape to leave a nice clean strip of card to add some words into.
Try out this washi tape and card stamping design for your next projects
#3 - Use foam squares to make your stamped image pop
This is another rubber stamp idea for creating cards that is super simple and effective. Begin by stamping a cute rubber stamp image onto some scrap white cardstock. Colour in the image however you please and once it's perfect, cut it out using some scissors or a craft knife. In the image below, I have colored a rubber-stamped owl using Derwent Inktense pencils.
This stamp embellishment can now be mounted onto your card base as the feature on the front of the card.
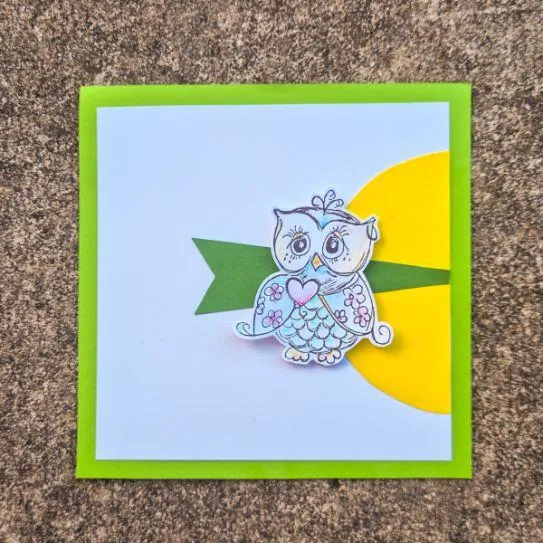
Make your cards extra special with this beautiful stamp embellishment idea
#4 - Colour in your stamped designs with markers
Grab your favorite markers and color in your rubber stamp designs once you have stamped them onto your card. It's just as relaxing as one of those mindful coloring books for adults!
I have used Copic Markers in the photograph below but you could use pencils, sharpies, or anything you have on hand.
Hand drawn art used as card embellishments
#5 - Stamp over a watercolor background
Use your rubber card making stamps over an abstract watercolor background for a visually appealing card that really wows. I created the card below for an earlier post on watercolor card making techniques however I felt like it was really missing something and couldn't work out what it was until now. It needed some rubber stamps!
Using two different star-shaped rubber stamps I was able to give this watercolor galaxy background a little extra wow factor.

Combine watercolor and stamping techniques to create amazing card designs
#6 - Give a sense of motion by allowing the ink to fade
Give your rubber stamp designs a sense of motion by restamping the same image multiple times without re-inking, resulting in a faded effect that gives a hint of motion blur.
In the example below, I have allowed my donut image to fade out, giving the impression of it falling from above. If only it would rain donuts in real life!
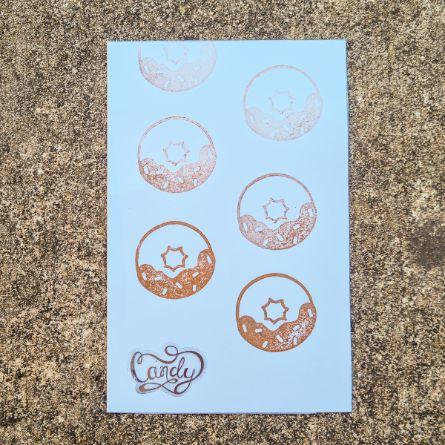
A perfect gift for someone with a sweet tooth
#7 - Stamp your rubbers stamps into ''windows''
Using your card making rubber stamps, stamp the designs into ''windows'' on your card front. The windows are easily made by cutting some circles or square shapes with a craft knife onto a second layer which are then be glued onto the front of your card.

A simple card making design you can try for your next project
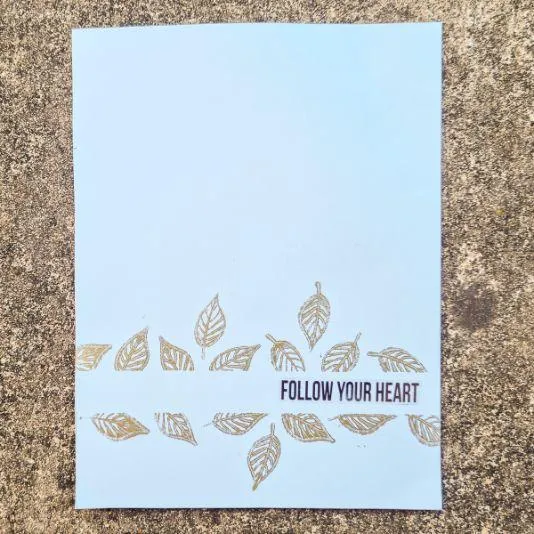
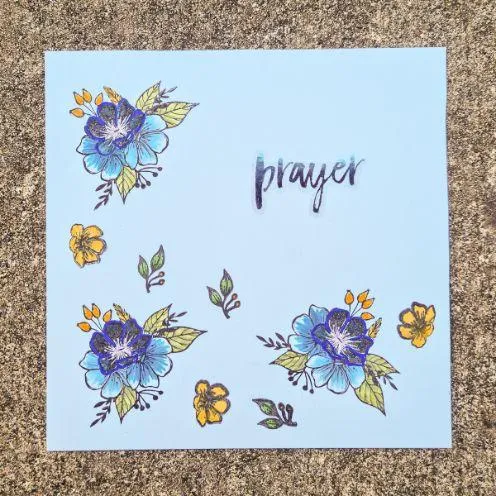
#8 - Use your rubber stamps to make a word-filled background
Use your rubber stamps for card making, your letter and word stamps that is, to create a background of inspirational words. This is a great project for if you don't have much time as you can use the same rubber stamp and just change the ink color a few times as I did in the photograph below.

A simple stamp pattern using different colors!
Tip: Sort your inks and paints into categories for a more stress free card making experience!
Although these are only eight simple examples, there is SO much more you can do with rubber stamps. Do you use stamps regularly in your card making? We would love to see some of your cards featuring rubber stamps.
Happy card-making!
Seen Our Sister Site?
Check out ScrapbookingCoach.com by clicking here.
© Copyright 2025 - CardMakingCollective.com