Stamping Card Supplies 101: Things You Need for Card Making
Ask any card maker and they will tell you that one of their best card making supplies is their stamp set. Creating cards from scratch is both fun and therapeutic and mastering the art of stamping can really take your craft to the next level.
Years ago, stamps consisted of a rubber stamp piece on a small wooden block that you dabbed into the ink and then onto your page. More often than not, it was a little messy. This style of stamp is still great and I still use them today, but there are now many more options available for you to fall in love with.
I've taken the guesswork out of it for you with this guide to stamping supplies for cardmaking. Keep reading to get started on your new and exciting journey into the world of stamping for cardmaking.
Table Of Contents
6.Dye Ink

The Different Stamp Types
Although you will see many names thrown around such as cling stamps, acrylic stamps, polymer stamps, rubber stamps, clear stamps, and photopolymer stamps they can be all broadly classified into two different types: rubber stamps and clear stamps. There are also DIY stamps but we will talk about this a bit further down.
Rubber Stamps
You are probably already familiar with rubber stamps for card making. They are the traditional red-colored stamps that are usually mounted on a woodblock and are ready to use with your ink straightway.
They last a long time but their one flaw is that you can't see through the wooden block to line up the stamp in an exact position. Sometimes this matters and sometimes it doesn't .. but when it does matter and you line it up wrong, it's incredibly frustrating.

Clear Stamps
Clear stamps have really changed the world of stamping and are designed so that you see through the actual pattern on the stamp to line them up precisely on the paper.
It's a great feature when trying to exactly line up lettering or when you need to double stamp something to add more color or shading. They are also great if you are a fan of die cutting as you can actually buy matching sets of dies and stamps to create some really wonderful embellishments.
Clear stamps are usually made from either acrylic or photopolymer, with the latter typically being of better quality. One of the best features of clear stamps is that they are not mounted onto a block. The reason this is a great feature is that you can create custom stamps by combining your small stamps onto a block, which is also clear. They can even be used in a stamping press, which we will talk about further down.

The acrylic blocks are reusable and come in a variety of sizes and shapes for your stamping needs. A block is essential for using clear stamps.
Clear stamps come on an acetate sheet and you peel them off and press them onto your clear block to begin stamping. When you are finished, they can be cleaned, removed from the block, and placed back on the sheet for storing.
It's really hard to find fault with clear stamps other than I just like the feel of the woodblock in my hand better. Clear stamps are easy to clean and store, and more importantly, they come in thousands of sizes, designs, and styles. They are affordable and often sold on a sheet with a particular theme.
It would only be fair if I gave you this warning now ... they are very addictive (like a washi tape) and will soon become one of your must have card making supplies.
DIY stamps
You can make stamps out of anything you want really! Leaves make a great texture stamp and you probably remember making potato stamps where you were a kid.
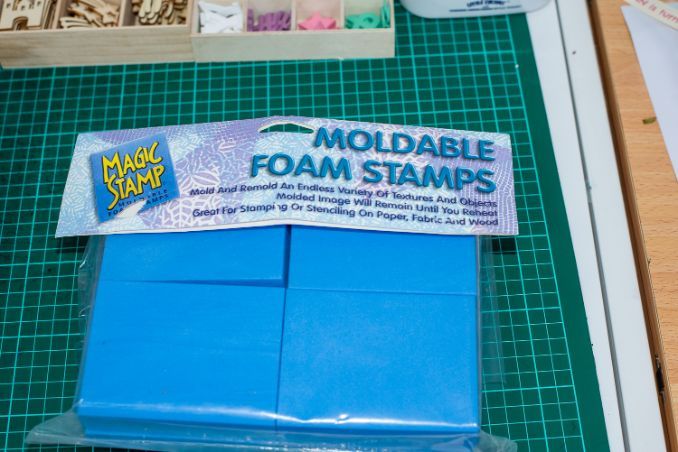
I was given a neat product a little while ago called ''Moldable Foam Stamps'' in which you use a heat gun to warm up the foam block for around 30 seconds, and then quickly hold down something onto the surface as it cools, effectively making your own foam stamp.
Being foam, it's not the best quality stamp in the world but it makes some really great textures for backgrounds depending on what you push into it. I suggest trying rice, pasta, or things found in nature.
Stamping Ink for Cards
Collecting stamping ink is almost as fun as collecting stamps. However, if you only want to fork out one stamping ink, black is the way to go. If you can find a waterproof one, even better! Waterproof ink will not smear when you paint over it with watercolor or go crazy with markers on your card.
As well as there being hundreds of colors to choose from, there are also many different inks to choose from. I'm going to talk about specialty inks, pigment inks, and dye inks.
Dye Inks
Dye inks are the standard ink for card making and are by far, the most popular. There is nothing wrong with just buying a few standard dye inks in different colors!
Specialty Inks
One of the most popular specialty inks is distressed ink. When it dries, it creates an aged effect that really adds something special to your cardmaking. There are different specialty inks out there but this is a great one to start experimenting with.
Pigment Inks
Pigment inks are opaque, meaning that they are solid in color and you can't see through them. They are a lot thicker than standard ink and as a result, are also used for embossing and in scrapbooking.
The Stamping Press
I feel like the stamping press was invented for those of us who can't deal with stamps unless they are precise and aligned every, single time. Basically, a stamping press has a hinged lid that acts in place of the stamping block.
It's really simple to use. You place your paper on the platform, then place your clear stamp of choice on top face down and close the lid. The stamp is now stuck to the underside of the lid which will act as your stamping block. You can now ink your stamp and re-close the ink to make your mark.
The benefit of the stamping block is that if you need to reink your stamp or you want to add another layer, you can do this as the paper and stamp are in the exact same spot.
Card Stamping Tips
Of course, you don't need to buy all of these things to achieve great stamping in card making. Start with a few different stamps and some basic dye ink and experiment!
I'm going to leave you now with my secret tip for stamping. Rather than push the stamp into the ink pad, like you would with your potato stamp into the paint when you were a kid, hold your stamp still in one hand and apply the ink to the stamp with a gentle motion. This ensures you don't accidentally overload your stamp and you soon learn the exact amount of ink you need as you can see the actual ink on the stamp.
What about you? Do you prefer rubber, clear or DIY stamps? Although I love my ''old fashioned'' rubber and clear stamps have opened up a whole new world for me and DIY stamps are just, well ... fun!
Whether you choose to use rubber stamps, clear stamps or DIY stamps, Now that you know the basics of stamping supplies for card making, we would love to see some of your finished stamped card designs.
Seen Our Sister Site?
Check out ScrapbookingCoach.com by clicking here.
© Copyright 2025 - CardMakingCollective.com