6 Amazing Card Making Layering Techniques

You will have so much fun trying out these amazing layering techniques.
What is layering?
Basically, layering is the building up of layers resulting in a raised effect or the illusion of depth. Layering can be subtle or exaggerated, but either way, incorporating some card making layering techniques into your greeting cards is a great way to give your work that extra something special.
Card making layering techniques

Layering can be used in many different ways, not just with paper and cardstock. From stamps and die cuts through to a cluster of layers and paper tole, here are six card making layering techniques that you can incorporate into your own DIY cards.
#1 - Layering with stamps
Test out your stamps on scrap pieces of paper first before applying them to your card base!
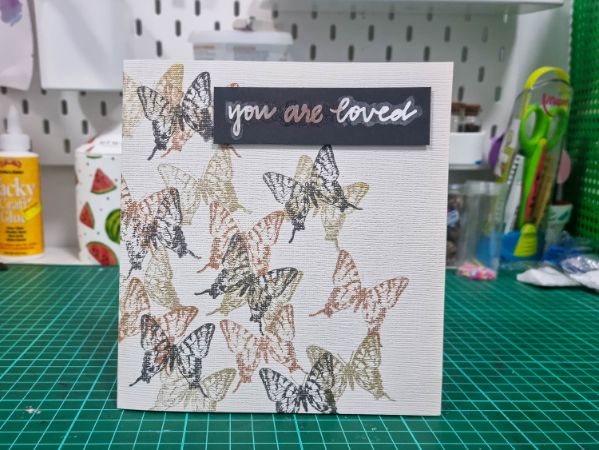
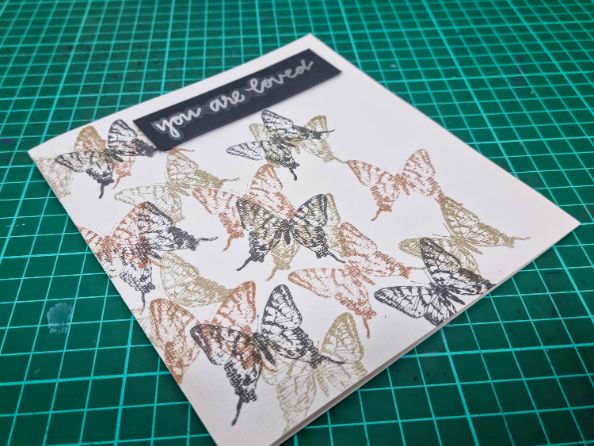
Layering with stamps is one of the easiest card making layering techniques to master. The secret to great stamp layering is to begin with your lightest color. Each subsequent layer should be darker than the previous layer. This helps with the illusion of depth as the darker colors completely cover the lighter colors underneath, making the lighter colors look further away and the darker colors look closer.
In the example above, I have used three different colored inks for three different layers. Beginning with gold, the lightest color, I then used brown ink for the second layer and finally black ink for the third and final layer.
Supplies:
Card base
3 different inks (make sure they are noticeably lighter/darker than each other)
Stamp
Stickers and scrap card for the sentiment
Here's how to make it:
Using your lightest ink, stamp the first layer onto your card base (see photo below - bottom left). When the first layer of ink has dried, stamp a second layer using your mid-tone ink. Make sure to overlap some of your lighter-colored stamps as this is what will give your card a layered effect.
Next, stamp a third and final layer using your darkest ink (see photo below - right). Again, you will want to make sure you are stamping on top of the previous layers to really create that layered effect and add some depth to the card.

Finish your card by making the sentiment with some scrap paper and stickers (see photo below). Adhere it to your card using double sided foam tape so that it pops out a little.
#2 - Layering with die
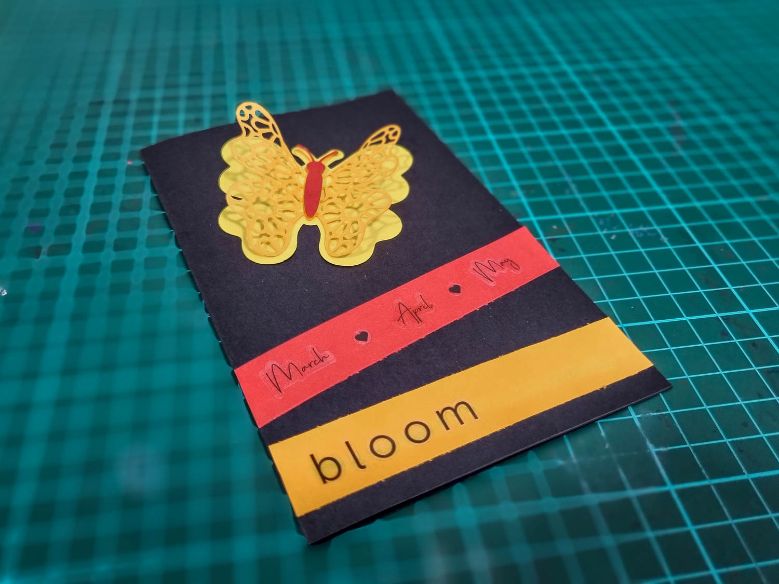
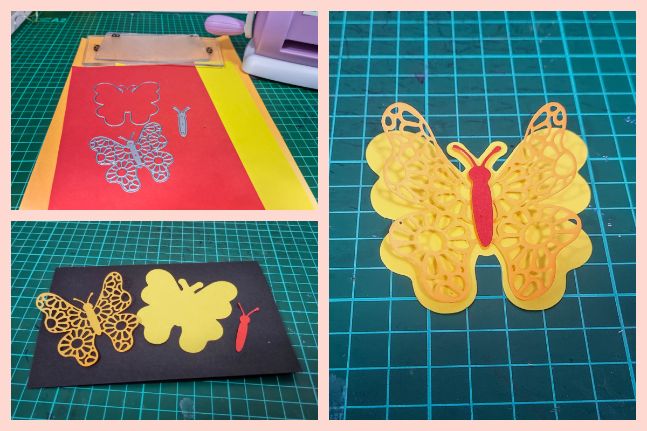
Card making layering techniques using die are easy as there are dies made specifically for this technique called nesting dies. Nesting dies are a set of metal dies that fit neatly inside each other. I have used a butterfly nesting die for the project in the image above. Just like when using stamps, this technique looks great when your lighter colors are used for the bottom layers as this helps with the illusion of depth.
What you will need:
Card base
Nesting die
Different color paper for each section of the die (light to dark colors)
Stickers and scrap card for the sentiment
Here's what to do:
Gather your die and paper and work out which color you will be using for each section of the nesting die. Go ahead and cut these out using your die cut machine. You can see from the photos below that my nesting die has three sections and I have chosen to use yellow, orange and red.
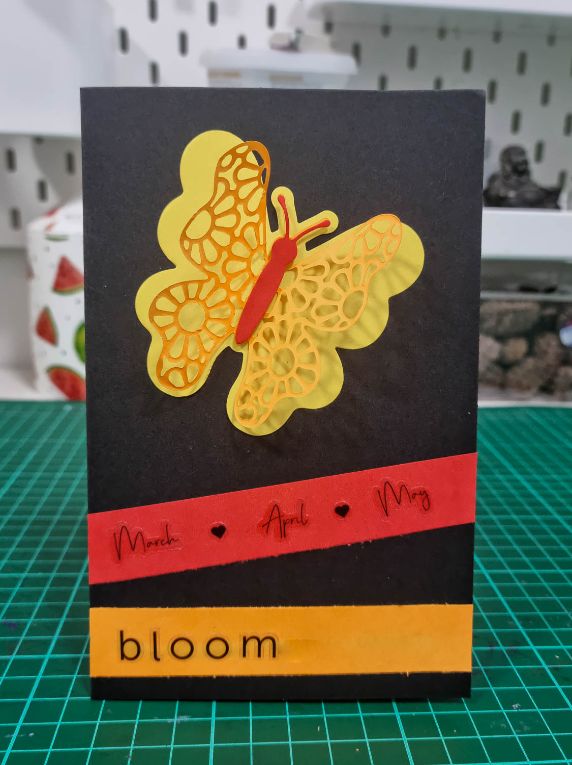
Next, as per the photograph below on the right, glue your die cuts together to create your layered element. On my die cut butterfly, I made sure to only glue the orange layer at the body so that I was free to fold the wings up in flight. The red body piece was adhered with some double-sided foam squares to make it pop a little.
Use acid free adhesives when adhering your embellishments!
Finish this greeting card by adhering the new layered element to your card and by creating your sentiment from stickers and card scraps.
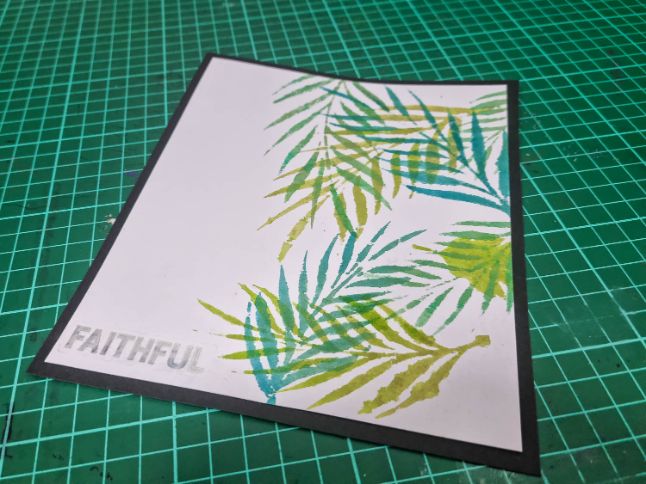
#3 - Layering with stencils
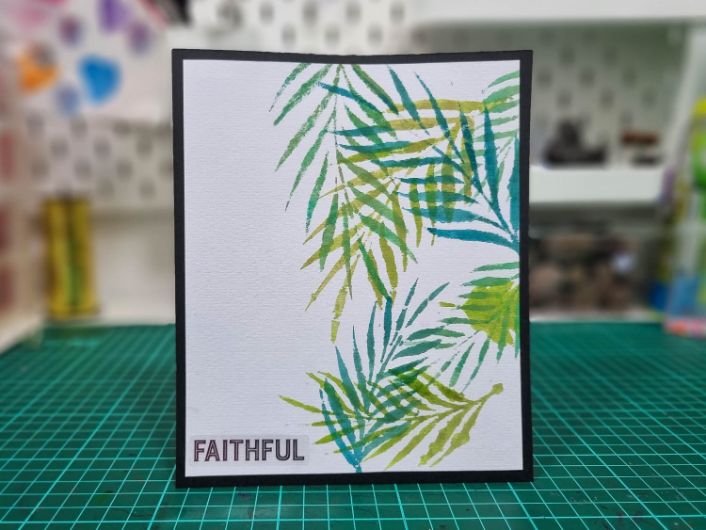
Using stencils utilizes exactly the same card making layering techniques as using stamps, except you will use a stencil and paint instead. In the example above I have used a simple leaf stencil and three different shades of green watercolour paint which I applied with a sponge. Like the stamp technique, starting with your lighter shades gives the illusion of depth.
Supplies:
Card base - dark colored
Card face - watercolor paper
Stencil
Paint
Sponge, foam pads or dabber
Sticker for the sentiment
Here's how to make it:
Lay out your watercolor paper on a flat surface and work out where the first layer of your stencil will go. Using your lightest color, load up your watercolor paint with a sponge, and dab over the top of the stencil (see photos below - top row).
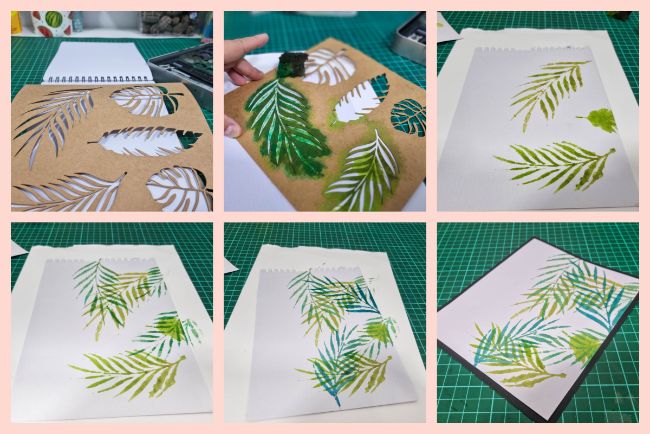
When this first layer has dried, it's time to move onto the second layer. Reposition your stencil and sponge on your next darkest color (see photos above - bottom left). Do this again for your darkest color for the third and final layer (see photos above - bottom middle).
Next, cut your watercolor paper to size, slightly smaller than your card base, and glue it down onto your card base as per the photos above (bottom right).
Finish off this layered stencil card by adding a sticker for the sentiment.
#4 - Layering simple rectangles
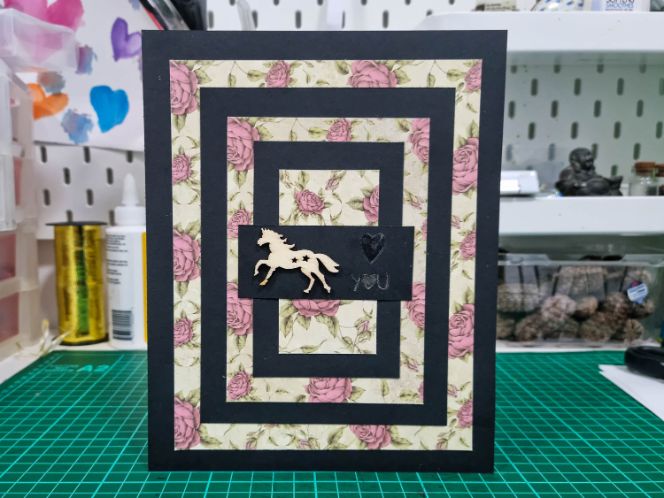
This card making layering technique uses a pattern of different sized rectangles and alternating plain and patterned cardstock layered on top of each other from biggest to smallest.
What you will need:
Card base
Plain colored cardstock or paper
Pattern cardstock or paper
A pre purchased embellishment
Scrap cardstock and sticker for the sentiment
Here's how to make it:
Starting with your plain colored cardstock, cut a rectangle the exact same size as the front face of your card base. Alternating between patterned and plain cardstock, cut five more pieces, each ½ an inch smaller on each side smaller than the last (see photos below - bottom left).
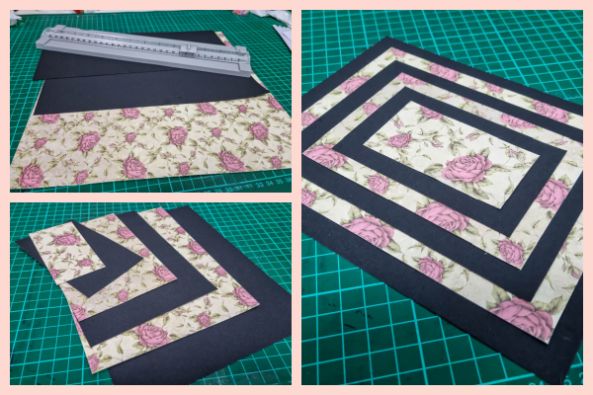
Glue these pieces onto your card base, beginning with the largest piece and ending with the smallest piece (see photos above - right).
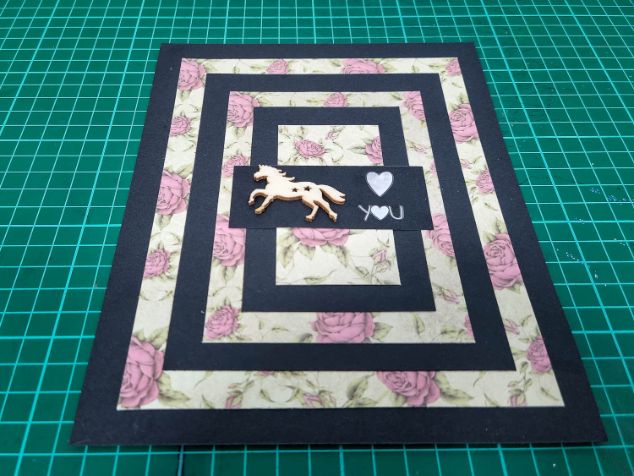
Next, using a scrap piece of cardstock and letter stickers, add the sentiment to your card as per the photograph below. For the final finishing touch, glue down a simple embellishment for some added interest.
#5 - You've got this

This handmade get well soon card idea features a stack of pretty colored bandaids and a sentiment that reads, "you've got this." This project is great as it uses up all your pretty scrap pieces that are too good to throw out yet are too small to be useful.
Supplies:
White card base
Mix of plain and patterned cardstock or paper scraps
Mix of graphics, stickers, tags, washi tape and embellishments
Here's how to make it:
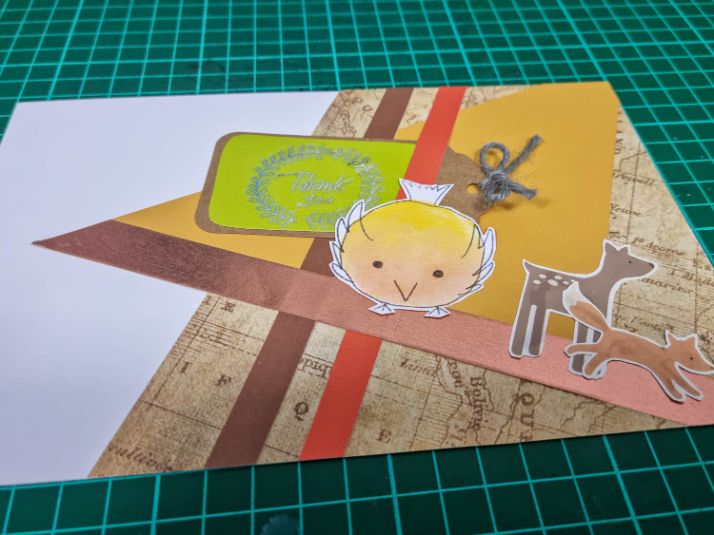
Gather your potential supplies and lay them out in front of you. Once you have a color scheme in mind, discard anything that won't fit in with your color scheme. I went for woodland colors of yellows and browns with a touch of green and the below is what I was left with.

The next part is the hardest as there is no set way to re-arrange your pieces. Just start with one of your larger pieces of cardstock/paper and place it on your cardface, making sure to leave some white space.
Don't glue anything down just yet!
Next, spend some time re-arranging and placing the other elements onto your card face until you've got it just right. Don't worry if this step takes a long time, sometimes it comes together quickly and sometimes it takes time. Remember not to encroach into the white space too much as its this white space that gives the cluster of layers a nice balance somewhere between minimal and cluttered.
Once you are happy with the result, go ahead and glue your pieces down.
6 - Simple paper tole layers
Paper tole craft was one of the first paper crafts I was introduced to as a child of around 9 years of age. My first project was a beautiful fairy picture that came in a kit and I was so very excited that my superbly crafty mum trusted me with a craft knife and what I considered to be a complicated project.
But what is paper tole? Well, its the art of making a three-dimensional picture from a flat print. This is done by reprinting and cutting certain elements of your picture and layering them on top of each other, usually with a piece of sticky foam or silicone glue between the pieces to give it some depth.
Supplies:
Card base
Scrap paper for the card face
A paper tole topper or a graphic that you have printed multiple times. I used >> THIS ONE << from designer Di Simpson on the website craftsuprint.com.
Foam squares or silicone glue
Letter stickers for the sentiment
Here's how to make it:
Start with your card base and glue down the 'base' elements such as any patterned paper and the image that you plan to create layers on. You can see in the photo below that I have glued down a spotty pattern and the image of a cowgirl as my starting point. You will also see a printout of the elements to be layered (from the link in the supplies section above) beside it.
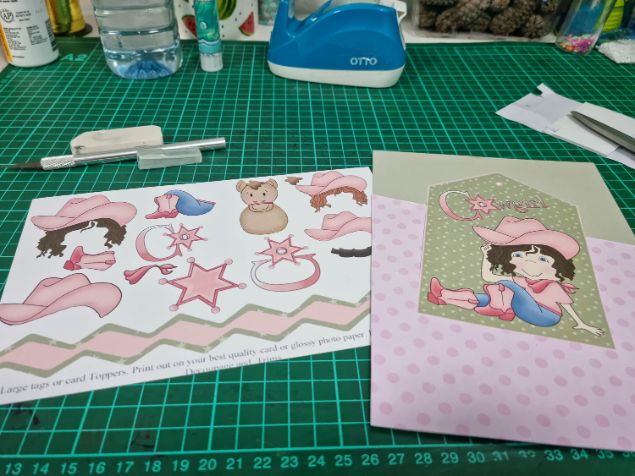
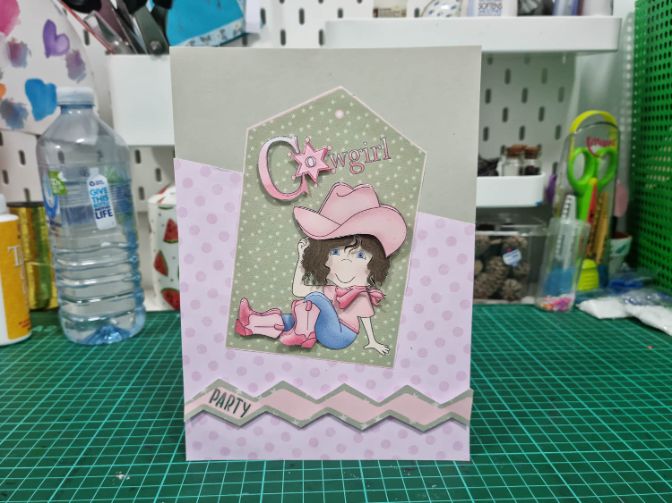
Once the 'base' of your design has been prepared, cut out the various elements of the graphic you wish to layer with a craft knife. This project is pretty simple in that the cowgirl's hat/hair, necktie, shoes and the letter C will be layered. You can layer these as many times as you like however I have chosen to just layer them once.
When your pieces have been cut out, adhere them to your base graphic using either double sided foam squares (you may have to trim these smaller) or silicone glue.
Finish this card by adding your sentiment stick to the card. I ended up sticking mine onto a zig zag piece that was included in the graphics kit mentioned above.
Use card making sketches as reference to create these amazing layouts.
What do you think?
What do you think? Are you ready to give some of these card making layering techniques a go? I would love to see your versions of any of these ideas.
Happy card making!
Seen Our Sister Site?
Check out ScrapbookingCoach.com by clicking here.
© Copyright 2025 - CardMakingCollective.com